My First Fossil

Many years ago, I was four wheeling in Rifle, Colorado in an old (even then) ’72 Jeep Wagoneer I’d bought from my dad.

My Dear Old Dad, who owned that old Wagoneer before I did!

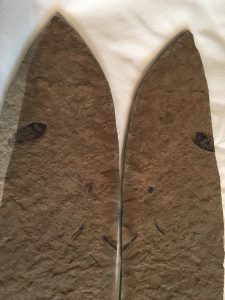
I happened to be going up a fairly steep incline to the north west of town when I decided I would pull over and check out the shale that was scattered abundantly on the higher side of the road, as the other side was an 80 foot cliff to the next switch back of the road I was on.  One particular piece of rock looked like two layers stuck together with one layer missing a small edge.

That shale before I took a chisel to it.

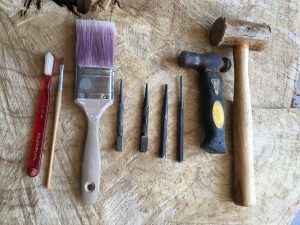
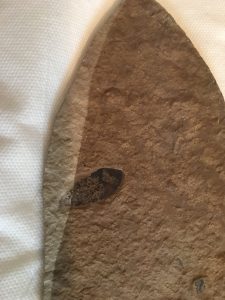
The other edge had a dark leaf looking area sticking out so I took a  hammer and chisel and attempted to separate the two halves and behold, the split revealed a small leaf, I had found an actual fossil.

I was ecstatic!  I had found evidence of past life, who knew how old the shale was, or what type of leaf I’d found, what mattered was the fact I had all of a sudden entered a hobby that would consume my every spare moment for years to come.

After it was split open.
A closeup of the leaf

Since then I have collected in 38 of the 50 US States, I have found fossils on beaches to mountain tops. I have found 200 million year old crinoids to 450 million year old trilobites. I have found 10 million year old wood. I’ve even found fossils in the pebbles we use in landscaping.

Fossil preservation and preparation

The fossils we collectors gather have been buried in the rock for hundreds of thousands of years to millennia.

When we’re lucky to find one, it’s invariably been exposed for a short time, and we’re not speaking of geological time we’re speaking of months or years.

real fossil preparation

So we collect them and thereby become stewards of the past.  With that stewardship comes the responsibility of fossil preservation for each specimen.  If the fossil is of softer material, care must be taken to prevent damage when preserving.

Fossil Preparation

The first item of business would be to collect a tool kit.

You will need:

    • a small hammer,
    • a few different sized pointed chisels and
    • a couple of soft bristled brushes.

There are kits you can buy, or you can assemble your tool kit from several sources.

real fossil preparation

Next is to carefully clear all excess material off of the fossil, using a small pointed chisel and a hammer.

Carefully chip away at the excess  material above the fossil with the small chisel using light tapping with the hammer.  Using your soft brush remove loose dust and dirt to uncover the fossil.

Using a little water can also be helpful as the surrounding material sometimes softens up with extra moisture.

Then use the brush to continue to clean the material from the finer features of the fossil.   Patience is a virtue when cleaning a fossil, so take your time.

Fossil Preservation

Once the fossil is uncovered, a good way for preservation is with an Elmer’s Glue and water solution.  One part glue and 5 parts water is a good start with a couple of capfuls of  rubbing alcohol for penetration.

Try this on a piece of the strata that has no fossil material in it to make sure of compatibility.

Once the fossil is clean and visible, a light spritz of the glue and water solution should protect it from the elements.

Of course there are electric and compressed air, fine pointed, power tools to assist in the cleaning.  Some not only clean the excess off but also supply a stream of air during processing to blow away the excess, allowing better visibility of the fossil during operations.

A good place to shop for a book on fossil identification might be Amazon.com.  They have several that are available.

Good luck, leave me a comment of your success, or your fossil stories or just let me know how to improve the site!

SaveSave

SaveSave

SaveSave

SaveSave

SaveSave

SaveSave

SaveSave

SaveSave